
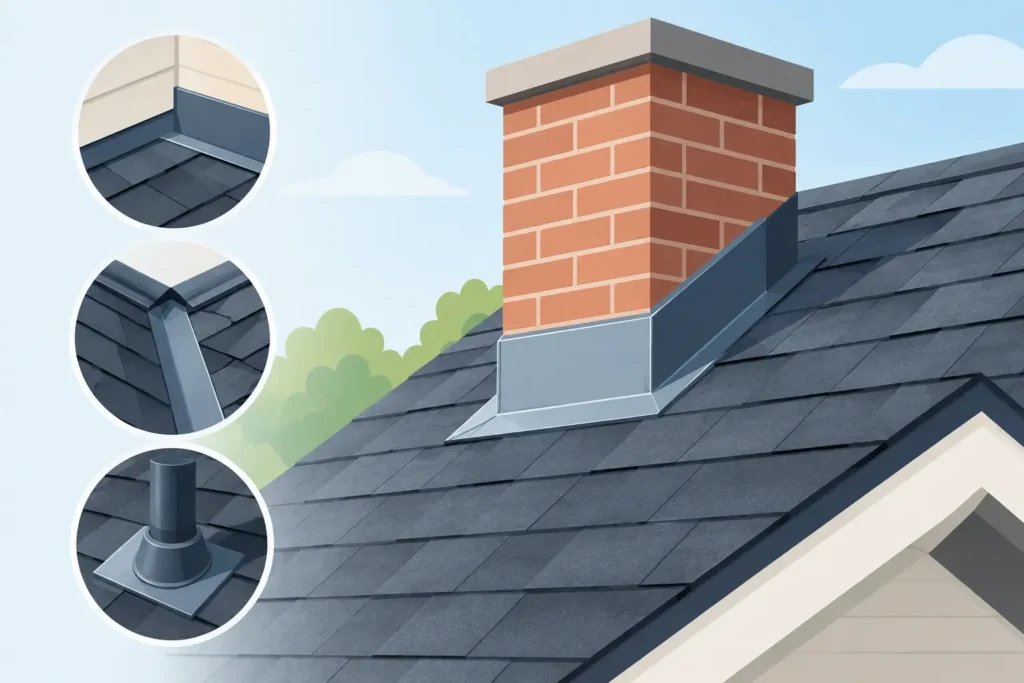
A roof can have quality shingles, a strong underlayment, and years of useful life left – yet still leak around a chimney, wall, vent, or valley. In many of these cases, the issue is roof flashing. This thin but essential weatherproofing material directs rainwater away from openings and transitions where roofing materials alone cannot create a dependable seal.
For Florida homes and commercial properties, flashing does more than finish the appearance of a roof. It helps defend the building against wind-driven rain, humidity, storm debris, and the repeated heavy downpours that can expose even a small installation error. When flashing is damaged, poorly integrated, or sealed with a temporary patch that has failed, water can reach decking, insulation, ceilings, and wall systems before the problem becomes visible indoors.
What Roof Flashing Does
Roof flashing is usually made from galvanized steel, aluminum, copper, or a compatible coated metal. It is installed at areas where the roof changes direction or meets another part of the building. Rather than trying to stop water with caulk alone, properly installed flashing uses overlapping layers and gravity to carry water safely onto the roof surface and toward the gutters or drainage system.
That distinction matters. Sealant is useful at specific fasteners and joints, but it will eventually age under Florida sun, heat, and rain. Flashing should remain the primary water-management detail. If a repair relies entirely on a thick bead of roofing cement or caulk, it may be a short-term solution rather than a lasting repair.
The most common flashing locations include roof valleys, chimney bases, skylights, vent pipes, dormers, wall intersections, and the edges of low-slope or flat roofing systems. Each location needs a detail suited to the roof material, pitch, drainage path, and surrounding construction.
The Flashing Areas Most Likely to Leak
Chimneys and Sidewalls
A chimney creates one of the most complex intersections on a sloped roof. Water flows around both sides, collects behind the chimney, and can enter wherever metal is improperly lapped or mortar joints are failing. A properly detailed chimney generally uses step flashing along the sides, base flashing at the lower edge, counterflashing secured into the masonry, and a cricket behind wider chimneys to divert water.
Sidewalls need the same attention. Step flashing should be woven into each course of shingles where a vertical wall meets the roof. The wall cladding or trim must then cover the top edge of the flashing. Simply running a strip of metal against the wall and sealing it at the top is not equivalent to a fully integrated system.
Plumbing Vents and Roof Penetrations
Plumbing vent pipes, exhaust vents, attic fans, and other roof penetrations need flashing boots or purpose-made collars. Rubber components around vent pipes are especially vulnerable in Florida because ultraviolet exposure can cause cracking and deterioration. Once the boot splits, rain can enter around the pipe and travel along framing or insulation before staining a ceiling.
A damaged vent boot is often a manageable repair when caught early. But if water has been entering for months, a contractor may need to inspect the surrounding decking and attic area as well. The visible crack is not always the full extent of the damage.
Valleys, Skylights, and Dormers
Roof valleys handle a high volume of runoff because they collect water from two roof slopes. Valley flashing or valley membranes must be installed cleanly, with proper overlap and without exposed fasteners in the main water channel. Leaves, pine needles, and storm debris can slow drainage here, increasing the chance that water backs up beneath shingles.
Skylights and dormers add multiple corners and transitions, making them dependent on precise flashing. A leak around a skylight does not automatically mean the skylight itself has failed. The surrounding flashing, shingles, sealants, or underlayment may be the actual source. Identifying the correct cause before replacing parts protects your budget and avoids repeat repairs.
Flat Roof Edges and Transitions
Commercial and residential flat roofs use different flashing systems than shingle roofs. Membrane flashing may be adhered, mechanically attached, or heat-welded at parapet walls, curbs, drains, scuppers, and equipment penetrations. These details are critical because flat roofs drain more slowly and standing water can magnify weaknesses.
For facility managers, failed perimeter flashing can be particularly disruptive. Water may enter above offices, inventory areas, electrical systems, or customer spaces. Regular inspections help identify loose terminations, membrane separation, open seams, and failing sealants before a storm turns a small defect into an operational interruption.
Warning Signs You Should Not Ignore
Some flashing problems are visible from the ground, while others only show up after a hard rain. Water stains on ceilings or upper walls are obvious concerns, but they are often late-stage symptoms. By that point, moisture may have already affected wood decking, drywall, insulation, or framing.
Look for lifted or missing shingles near a chimney, rusty or bent metal, cracked pipe boots, loose flashing at a wall, granules collecting near valleys, or dark streaks below a roof transition. On a flat roof, watch for bubbling membrane edges, separated flashing, ponding water that remains long after rainfall, or stains near interior perimeter walls.
A musty attic smell, wet insulation, peeling paint near a roofline, or unexplained moisture around a skylight also deserves attention. In Florida, high humidity can make it harder to distinguish roof leaks from condensation, which is why a professional inspection is valuable. The goal is to trace the moisture to its source instead of treating the nearest stain.
Why Flashing Fails in Florida
Age is one cause, but it is far from the only one. Hurricane-force winds and wind-driven rain can lift shingles, bend exposed metal, loosen fasteners, and force water into small gaps. Debris impact can puncture or dislodge flashing. Thermal movement from intense sun and changing temperatures can stress joints and sealants over time.
Installation quality also plays a major role. Flashing needs correct overlap, compatible metals, properly placed fasteners, and integration with the roof covering. For example, aluminum and copper should not be used together without appropriate separation because galvanic corrosion can occur. Improperly placed nails can create direct leak paths, while flashing installed over shingles rather than woven into them may channel water behind the roof system.
Previous repairs can complicate the situation. Layering roof cement over a recurring leak may hide the symptom but leave defective flashing underneath. A thorough repair starts by removing materials as needed, inspecting the decking and underlayment, correcting the water path, and restoring the roof surface to match the manufacturer’s installation requirements.
Repair or Replacement: How to Make the Right Call
Localized flashing damage does not always require a full roof replacement. If shingles and underlayment are in sound condition and the issue is limited to one vent pipe, a small wall section, or a chimney detail, targeted repair can be the practical choice. The work should still include an inspection of the adjacent materials, because water rarely respects a neat boundary.
Replacement becomes more sensible when flashing failures are widespread, the roof is near the end of its service life, decking has deteriorated, or a storm has damaged multiple components. It can also be the better long-term investment when an older roof has repeated leaks at different transitions. Replacing the roof system together allows the contractor to install new flashing, underlayment, and roof covering as one coordinated assembly.
For a business property, timing may influence the decision. A temporary emergency repair may be necessary to protect the interior immediately, followed by a scheduled permanent repair or reroofing plan that minimizes disruption. For homeowners, financing options can make a needed repair or replacement more manageable without delaying protection during storm season.
Protect Flashing With Routine Roof Care
You do not need to walk on your roof to help protect its flashing. Keep gutters and valleys clear so water can drain freely, trim branches that scrape the roof or drop heavy debris, and arrange an inspection after major storms. Avoid letting untrained workers attach satellite equipment, signs, solar components, or other hardware through roofing materials without proper flashing details.
A professional roof inspection is especially worthwhile before hurricane season, after a named storm, and when buying or managing an older property. Florida’s Roofing & Construction Group can evaluate flashing as part of a broader roof assessment, identify active vulnerabilities, and explain whether a repair is appropriate or larger work is justified.
The small metal details around your roof are easy to overlook until water finds a way inside. Addressing damaged flashing early helps protect the structure, indoor comfort, and value of the property – and gives you one less concern when the next Florida storm moves in.